Table of Contents
ToggleBuilding an outdoor kitchen transforms your backyard into an entertainment hub, but the foundation matters just as much as the grill. Outdoor kitchen pavers provide the stable, level base that grills, countertops, and seating need to function properly and last for years. Whether you’re pouring a fresh patio or refreshing an existing one, choosing the right pavers and installing them correctly prevents settling, cracking, and costly repairs down the line. This guide walks you through selecting materials, assessing your site, and laying pavers like a pro, even if you’ve never done it before.
Key Takeaways
- Outdoor kitchen pavers distribute weight evenly and allow proper drainage, preventing settling, cracking, and water damage that concrete slabs can’t avoid.
- Natural stone, concrete, and porcelain pavers each offer distinct advantages—choose based on your climate, budget, and maintenance tolerance; bluestone and porcelain are ideal for heavy-use cooking areas.
- Proper site preparation including slope grading (1/8 inch per foot), compacted gravel base, and edge restraints are non-negotiable to prevent long-term movement and failure.
- Polymeric sand in joints significantly outperforms regular sand, locking pavers in place for 5–10 years and worth the extra cost for durability.
- Renting a vibrating plate compactor ($40–$60 per day) is essential for large patios; skipping proper compaction is the #1 cause of settling.
- Maintenance is minimal but matters—sweep regularly, use pavers-safe ice melt in winter, avoid pressure washers, and reset any heaved pavers immediately to prevent water infiltration.
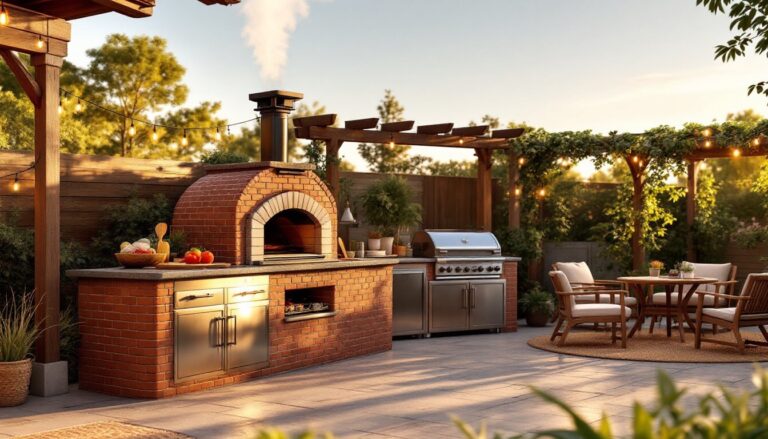
Why Pavers Are Essential for Your Outdoor Kitchen
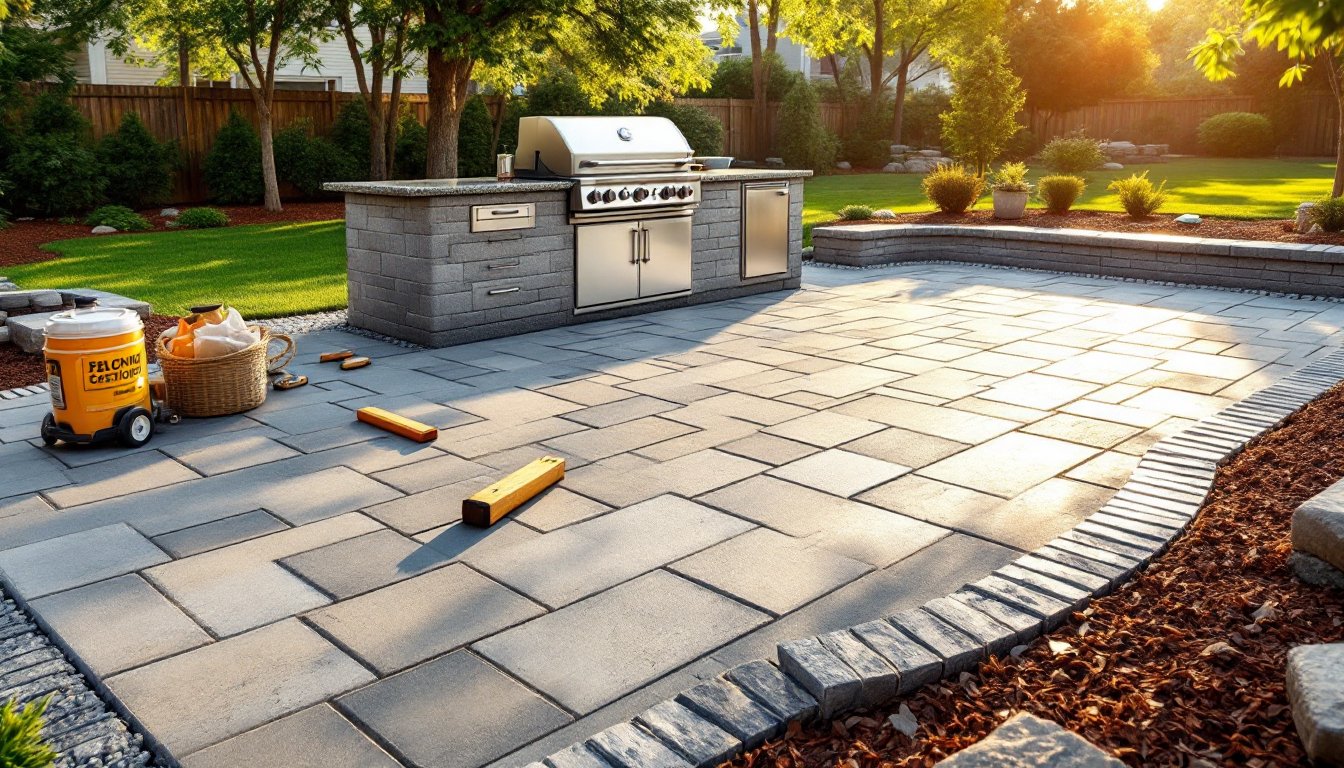
A solid paver base is non-negotiable for outdoor kitchens. Unlike a deck or concrete slab, pavers distribute weight evenly across a compacted gravel foundation, allowing for slight natural settling without cracking. Grills, pizza ovens, and built-in countertops are heavy, a typical stainless steel grill weighs 300–500 pounds, and granite countertops add another 100+ pounds per linear foot. If your base isn’t properly prepared and compacted, you’ll get uneven settling, which means your grill won’t sit flush, doors won’t close right, and water pools in places it shouldn’t.
Payers also offer flexibility that poured concrete doesn’t. If you need to relocate a feature or repair a section, you can lift pavers and reset them without jackhammering. They drain better too, standing water under outdoor kitchen structures invites rot and mold. Finally, pavers look intentional and finished. An outdoor kitchen with pavers on a well-laid patio base signals that you’ve invested care into the space, not just plopped a grill in the grass.
Types of Pavers for Outdoor Kitchen Spaces
Natural Stone and Concrete Options
Natural stone pavers, bluestone, slate, flagstone, and travertine, offer timeless aesthetics and durability. Bluestone, a quarried sedimentary rock from the northeastern U.S., is popular because it’s dense, slip-resistant when honed, and handles freeze-thaw cycles well. Expect to pay $8–$15 per square foot installed. Slate is thinner and more dramatic but splits more easily during installation, so it suits design accents rather than the entire work zone. Travertine looks elegant but is softer and more porous, it stains easily and needs sealing annually, making it less ideal for heavy-duty cooking areas.
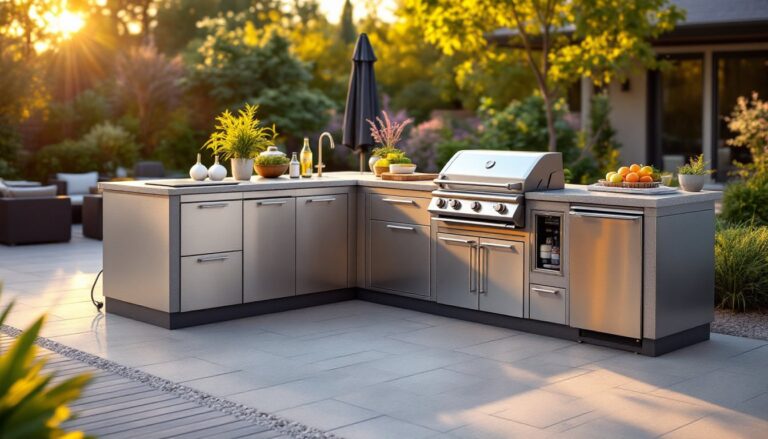
Concrete pavers are the budget-friendly workhorse. Manufactured pavers come in countless shapes and colors, cost $2–$5 per square foot, and are uniform in thickness (typically 2 or 2.375 inches nominal). They won’t crack as easily as natural stone if you drop a cast iron pan. Stamped concrete pavers mimic slate or brick appearance but lack the authentic texture.
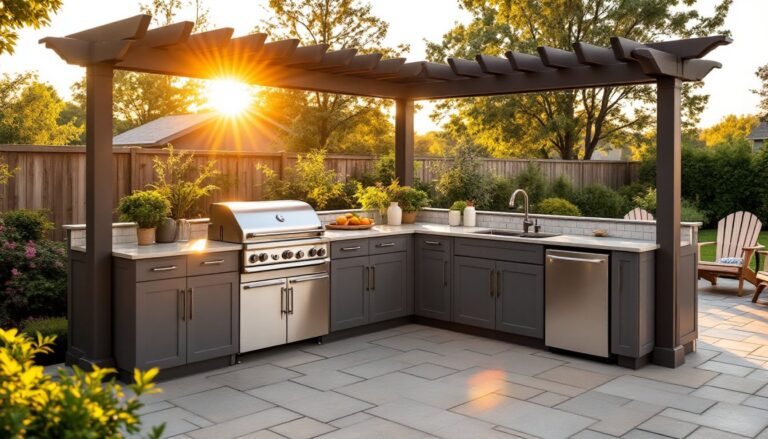
Porcelain pavers bridge the gap: they’re stain-resistant, non-porous, and available in stone-look finishes. They’re pricier ($8–$12 per square foot) and require professional-grade tools to cut, but they’re virtually maintenance-free. For an outdoor kitchen with pavers that will take a beating from grease splatter and heat, porcelain is a smart choice if budget allows.
Key Factors to Consider Before Installation
Drainage and Slope: Pavers must slope away from your cooking area at a minimum of 1/8 inch per linear foot (1% slope). Mark your highest point, typically where the grill sits, and measure down. Poor drainage pools water and accelerates frost heave in cold climates. Your gravel base should also slope: this isn’t optional.
Frost Line and Subgrade: In colder regions, frost heave lifts pavers in winter. Check your local frost line depth (New England hits 3–4 feet: milder zones might be 12–18 inches) and contact your local building department or check the homeowner resources available at HomeAdvisor for codes in your area. Compact the base gravel below the frost line to minimize heave.
Soil Condition: Sandy, well-draining soil is ideal. Clay holds water and shifts, if your yard is clay-heavy, add a drainage layer or consider a permeable base like recycled asphalt. Test by digging 12 inches and observing how quickly water drains after a rain.
Load-Bearing: Heavy equipment requires proper support. For grills and ovens over 500 pounds, reinforce the base with a 4-inch compacted gravel layer plus 1–2 inches of polymeric sand (not regular sand, which washes out). Consult structural load specs if you’re installing a built-in kitchen: for DIY work at this scale, hiring a contractor to verify the foundation isn’t overkill.
Material Acclimation: If installing natural stone in cool weather, let materials sit on-site for 48 hours to adjust to ambient temperature. Dry materials placed in wet conditions absorb moisture and swell slightly: rushing installation causes visible gaps as they dry.
Step-by-Step Installation Guide
Step 1: Prep and Grade the Site
Mark the patio area with stakes and a string line. Excavate 4–6 inches deep (or 2–3 inches deeper if you’re in a freeze zone and going thick on gravel). Remove roots, rocks, and debris. Compact the subgrade with a hand tamper or plate compactor, this is critical and often skipped. A loose subgrade is the #1 reason for settling.
Slope the subgrade at 1/8 inch per foot away from your cooking station using a laser level or a long straightedge and slope calculator.
Step 2: Add and Compact Gravel
Lay 3–4 inches of crushed stone or recycled asphalt. Don’t use marble chips or beach sand, you need angular, compactable material. Spray with water as you spread (damp material compacts better) and compact in 1-inch lifts. Hit it hard: use a vibrating plate compactor, not a hand tamper, if the area is over 100 square feet. A rented plate compactor costs $40–$60 per day and saves your back and time.
Step 3: Lay Edge Restraints
Install plastic or metal edging around the perimeter to keep pavers from shifting outward. Nail or screw it down every 18 inches. This isn’t optional, without it, pavers creep, and your line gets wonky within a year.
Step 4: Set a Sand Bed
Spread 1–1.5 inches of polymeric sand (also called “polymeric joint sand”) or kiln-dried mason sand. Screed it level with a straightedge. Polymeric sand is worth the extra cost, it locks with moisture and stabilizes pavers better than plain sand. Note: use a dust mask when spreading: sand silica is a respiratory hazard with chronic exposure.
Step 5: Lay Pavers
Start from a corner and work in a running-bond or similar pattern. Set each paver firmly by tapping with a rubber mallet. Check level every 4–5 pavers using a 2–3-foot level. Small variations look okay: 1/4-inch differences are acceptable but aim for 1/8 inch or less.
For an outdoor kitchen with pavers, keep the work zone as close to level as practical. Lay pavers at a slight slope (1/8 inch per foot) away from the grill and prep areas to shed water and grease.
Step 6: Cut and Fill
Wet-cut pavers with a circular saw and diamond blade (wear a respirator and goggles, silica dust is nasty) or use an angle grinder. Concrete cuts faster with a wet saw: stone often splits cleaner on a diamond blade. Fit edge pieces and fill gaps.
Step 7: Fill Joints and Harden
If using polymeric sand, spread dry polymeric joint sand across the patio, brush it into joints, and mist lightly with water. Don’t oversaturate, too much water activates the polymer too quickly. Follow the product instructions: curing takes 24–48 hours. During this time, don’t walk on the patio or allow foot traffic.
For regular mason sand, simply brush it into joints and water gently. It won’t bind as firmly but costs less and is easier to adjust if you need to reset a paver.
Tools You’ll Need:
- Excavator or shovel
- Plate compactor (rent)
- Long straightedge or laser level
- Rubber mallet
- 2–3-foot level
- Wet saw or circular saw with diamond blade (or angle grinder)
- Knee pads
- Work gloves, goggles, and dust mask
- Wheelbarrow
- Broom
Maintenance and Long-Term Care
Properly installed pavers require minimal upkeep. Sweep debris monthly and rinse with a garden hose after grilling season. For stains from grease or rust, use a mild degreaser (biodegradable if possible) and scrub with a soft-bristled brush, avoid pressure washers on pavers as high pressure forces water under the surface and loosens the polymeric sand.
Check the patio annually for settling or shifting, especially after winter. If a section has heaved or cracked, resist the temptation to ignore it, water infiltration accelerates damage. Lift and reset the affected paver, re-compact the gravel, and reset. If more than a few pavers have moved, the subgrade may need reinforcement: this is a sign to consult a professional.
Polymeric sand joints stay stable for 5–10 years depending on foot traffic and climate. When joints erode visibly, sweep in fresh polymeric sand and re-activate. If you’re building <a href="https://youcanpaddle.com/modern-outdoor-living-space-ideas/”>modern outdoor living space ideas into your patio, periodic top-up of joint sand keeps everything locked in. Sealing natural stone pavers every 1–2 years preserves color and adds water resistance: concrete doesn’t require sealing unless you want to darken the color.
During harsh winters, avoid using salt-based ice melt on pavers, it degrades concrete and stone over time. Use sand, calcium chloride, or pavers-safe products. If your region experiences deep freeze-thaw cycles, expect minor settling: it’s normal and doesn’t indicate failure if only 1/4 inch of movement occurs.
Conclusion
Installing outdoor kitchen pavers isn’t mysterious, it’s methodical prep work, solid material selection, and careful installation. The payoff is a stable, level surface that handles grills, countertops, and years of cooking without cracking or settling. Start with quality site prep, choose materials suited to your climate and budget, and don’t skip the compacting. If the scope feels overwhelming, hiring a contractor for the excavation and gravel base saves time and eliminates the most labor-intensive step. Either way, a paver patio is one of the highest-ROI outdoor kitchen investments you can make.