
Table of Contents
ToggleA modular outdoor kitchen transforms your backyard into a functional entertaining hub without requiring a permanent, expensive built-in installation. Whether you’re a seasoned griller or just want to upgrade weekend gatherings, a modular outdoor kitchen gives you the flexibility to start small and expand as your needs and budget allow. Unlike traditional outdoor kitchens that demand professional installation and structural commitments, modular systems let you customize your cooking setup, move components if you relocate, and swap out equipment when better products arrive. This practical approach appeals to DIY homeowners and renters alike, you get restaurant-quality cooking capacity in your own yard, without the contractor bills or permanent footprint.
Key Takeaways
- A modular outdoor kitchen offers flexibility and scalability, allowing you to start small and expand modules over time without the $5,000–$15,000 cost of a built-in installation.
- Modular systems eliminate the need for permanent installation, permits, and professional contractors—most components connect via quick-release hoses and plugs on existing patios or decks.
- Essential modules include a grill (your core component), prep surfaces, beverage coolers, storage, and optional sinks, which you can mix and match based on your entertaining style and space.
- Proper planning ensures a logical workflow and levelness; measure your space, arrange modules with the grill as the centerpiece, and use a bubble level to prevent rocking or shifting.
- DIY installation requires basic tools and attention to safety protocols like testing gas connections with soapy water and using GFCI-protected electrical outlets for any powered appliances.
- Seasonal maintenance—including stainless steel cleaning, grate brushing, propane tank inspection, and structural bolt checks—extends the life of your modular kitchen by 10–15 years or more.
What Is a Modular Outdoor Kitchen?
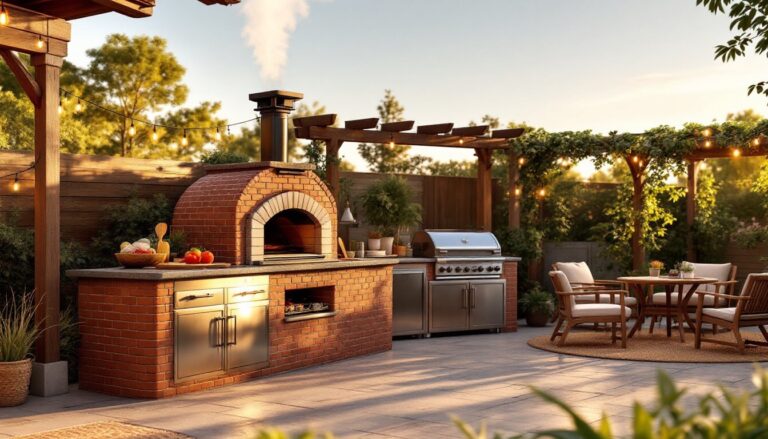
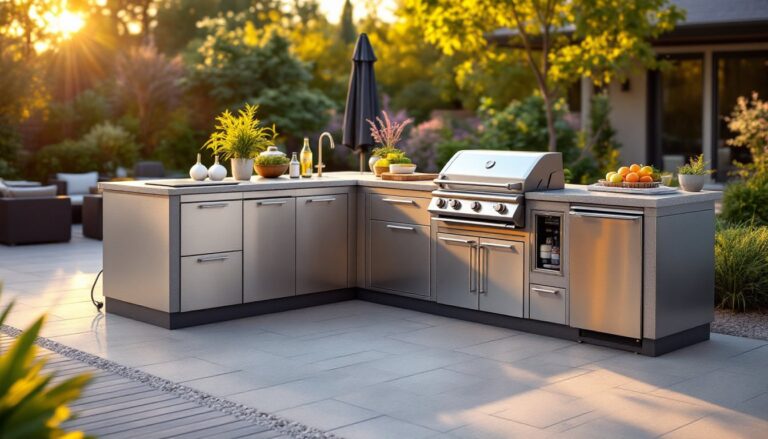
A modular outdoor kitchen is a collection of independent, self-contained cooking and prep modules that connect together to form a complete cooking workspace. Think of it as LEGO blocks for your backyard, each piece (grill, mini fridge, sink, storage cabinet, cart) works standalone but combines to create a cohesive system.
Unlike a built-in outdoor kitchen, which is permanently anchored to a patio and often requires a foundation, plumbing permits, and electrical work, modular kitchens sit on existing surfaces and connect via quick-release hoses and plugs. A stainless steel grill cart with storage can operate independently. Add a beverage cooler next to it, then a mobile prep station, and suddenly you have a full kitchen footprint, with zero permanent installation.
These systems come in prefabricated modules (ready to assemble on-site) or as individual appliances designed to work together. Most modular units stack, nest, or line up on a patio, deck, or even a gravel pad. The key advantage: you own the flexibility.
Key Advantages of Choosing a Modular Design
Flexibility and Scalability. Start with a grill and add modules as your budget and entertaining style evolve. No commitment to a full kitchen build-out from day one. If you move, most modular components travel with you or suit a new layout.
Lower Upfront Cost. A single stainless steel cart with a quality gas grill might run $800–$1,500. A custom built-in outdoor kitchen easily exceeds $5,000–$15,000 once you factor in materials, footings, and labor. Modular lets you spread investment over time.
Easier Installation. Many modules arrive partially assembled and need only bolt-together legs, a fuel connection, and sometimes a power cord. No concrete pads, no trenching for water lines, and no permitting (in most cases), though always check local codes first.
Simplicity and Maintenance. Because modules are portable and self-contained, repairs or replacements are straightforward. If a cart’s bottom shelf rusts, swap the whole cart without reworking plumbing or electrical. Components are also easier to clean and store seasonally if needed.
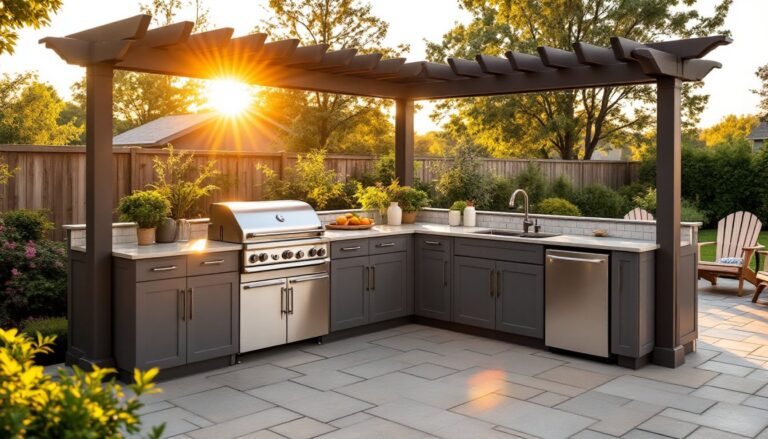
Design Freedom. Choose modules in different styles and materials, stainless steel, powder-coated steel, tile-topped tables. Arrange them in an L-shape, straight line, or U-configuration based on your space and workflow. This aligns well with <a href="https://youcanpaddle.com/modern-outdoor-living-space-ideas/”>modern outdoor living space ideas that prioritize personalized comfort and style.
Essential Components and Modules to Consider
Cooking Stations and Appliances
The grill is your core module. Options range from portable propane grills ($200–$500) to built-on cart units with side burners ($800–$2,000+). Gas grills heat quickly and offer temperature control: charcoal grills deliver classic flavor but demand more attention. Pellet grills add versatility (smoking, roasting, baking) for $1,200–$3,000.
A side burner (usually one or two burners mounted beside the main grill) lets you simmer sauces or boil vegetables without firing up the primary grill. Often bundled into cart-style grill modules.
Prep surfaces matter. A stainless steel work table, cutting board insert, or tile-topped cart provides space to assemble plates and prep ingredients. Standard depths are 24–30 inches: length varies from 24 to 60+ inches.
A beverage cooler or mini fridge keeps drinks and perishables cold. Under-counter fridges ($600–$1,200) slide into a cart gap, while standalone cooler carts ($300–$800) store ice and bottles without electricity.
Storage cabinets and drawers keep grilling tools, seasonings, and fuel accessible. Stainless steel and powder-coated steel resist rust: look for weatherproof seals on sliding doors.
A sink module requires a water connection and drainage plan, feasible on patios with outdoor faucets or via temporary hose hookups. Porcelain, stainless, or composite sinks ($400–$1,000) come on their own carts.
When selecting components, consider your entertaining style and frequency. A weekend griller with four friends might need just a grill and side prep surface. A frequent host planning larger gatherings benefits from additional burner power, cooler space, and prep area. Browse outdoor kitchen ideas on a budget for cost-effective options that don’t compromise quality.
Planning Your Layout and Space
Measure and sketch your zone. Determine how much patio or deck space you can dedicate to the kitchen, typically 8 × 10 feet or larger works well, but smaller setups function in 6 × 8 foot areas. Account for foot traffic, sight lines from the house, and clearance behind grills for safety.
Arrange modules in a logical workflow. Place the grill as the centerpiece, with prep surfaces on one or both sides. Position the cooler where guests can access drinks without moving through cooking zones. Stash storage and fuel behind or to the side.
Check utility access. If you plan a sink or mini fridge, confirm you have a nearby outdoor faucet and electrical outlet (or willingness to run weatherproof extension cords). Most decks and patios have at least one outlet: verify it’s rated for outdoor use (ground-fault circuit interrupter, or GFCI).
Consider wind and sun exposure. Afternoon shade keeps cooks comfortable during long meal prep. High-wind areas call for stable, weighted base modules and protective windscreens. Full-sun patios demand sunbrella umbrellas over the grill area.
Level the surface. Even slight slopes cause modules to rock and shift. A patio or deck is ideal: gravel or lawn pads need a level compacted base (2–4 inches of crushed stone, compacted). Uneven placement stresses connections and looks unprofessional.
Integrating your outdoor kitchen with custom outdoor living principles ensures the space feels intentional and cohesive with your home’s style and your family’s daily habits.
Installation and Setup Basics for DIY Projects
Before you start. Unpack all modules and verify components match the parts list. Check for shipping damage, dents, bent frames, or loose bolts. Lay out pieces dry (without fastening) to confirm fit and layout before final assembly.
Assemble per manufacturer instructions. Most cart-based modules use bolts, brackets, and simple hand tools, a wrench, socket set, and occasionally a drill with a bits set. Don’t over-tighten bolts: snug is sufficient, and over-torque can strip threads or crack welds.
Connect gas and water lines. Use stainless steel braided hoses rated for outdoor use. For propane, verify the regulator matches your propane tank (usually 20-lb. for residential grills). Tighten fittings with two wrenches (one on the nut, one on the fitting) to avoid twisting the line. Apply a soapy-water solution to connections and watch for bubbles, any movement signals a leak: retighten or replace the fitting.
Water lines on sink modules should use food-grade hose or rigid tubing. Ensure adequate slope toward a drain area (gravity drainage or a small sump)
Electrical setup. If adding a mini fridge or under-counter lighting, use a GFCI-protected outlet and weatherproof extension cord rated for outdoor use (usually 12 or 10 AWG gauge, depending on distance and load). Never bury extension cords: keep them visible and protected from foot traffic.
Safety checks. Test the grill igniter and burners on low, then medium and high. Verify propane connections hold pressure. If using a permanent electrical inlet, confirm a licensed electrician installed it per local electrical code (NEC, National Electrical Code).
Final positioning. Place each module in its final spot, checking levelness with a 4-foot bubble level. Shim under legs with composite shims if needed. Confirm modules don’t rock or shift when you press firmly. Secure hose connections with hose clamps and test all functions once more before your first cook.
Maintenance and Long-Term Care
Seasonal prep. At the start of grilling season, wipe down stainless steel modules with a microfiber cloth and stainless steel cleaner to remove winter dust and oxidation. Inspect gas hoses for cracks or hardening (they degrade in UV and cold): replace every 5–10 years or if damaged.
Grill grates and surfaces. Brush cast iron or steel grates after each cook (while warm, using a grill brush). This prevents rust and food buildup. If grates rust, scrub with a wire brush and oil lightly. Stainless steel surfaces benefit from a quick wipe-down after use.
Propane tank. Store upright in a secure, well-ventilated location away from direct sun. Check the tank valve for leaks annually (soapy water trick again). Have an empty tank refilled at a local propane dealer, never let it run dry, and never leave it attached during off-season storage.
Mini fridge and cooler modules. Empty and dry thoroughly before winter storage if you live in a cold climate, standing water can freeze and crack plastic or metal. Wipe seals and gaskets with a damp cloth monthly to prevent mildew.
Structural inspection. Every season, check bolts for tightness, welds or seams for new cracks, and caster wheels (if applicable) for smooth rolling and any debris. Retighten as needed.
Off-season storage. If you disassemble modules for winter, clean thoroughly, dry completely, and store in a garage or shed. Cover any uncovered modules with breathable tarps (not plastic, which traps moisture). Raise module legs slightly off the ground to allow air circulation underneath.
Regular care extends the life of your modular kitchen by 10–15 years or more, protecting your investment and ensuring reliable performance during countless gatherings.