
Table of Contents
ToggleSetting up outdoor surveillance used to mean hiring professionals and running conduit through walls. Today, a wireless outdoor camera like the Wyze outdoor camera can be installed in minutes, no electrician required. Whether you’re monitoring a driveway, porch, or backyard, the right outdoor monitoring setup gives you peace of mind without the complexity. This guide walks through choosing, installing, and optimizing Wyze outdoor cameras for your home, so you get reliable footage and clear visibility when it matters most.
Key Takeaways
- Wyze outdoor cameras provide DIY-friendly home security with no contracts, professional installation, or monthly fees, making them ideal for renters and homeowners seeking quick setup.
- Mount outdoor Wyze cameras 8–12 feet high at a 10–15 degree downward angle to capture faces while avoiding tampering and achieving optimal coverage of property corners.
- Maintain strong WiFi connectivity by positioning the camera within 40–50 feet of your router and using a WiFi extender if needed, since connection stability is critical for reliable recording.
- Supplement infrared night vision with motion-activated floodlights for color footage and improved identification accuracy, especially in security-critical areas like driveways and front doors.
- Clean the lens regularly with a soft cloth and inspect mounting hardware semi-annually to prevent image blur and ensure the outdoor Wyze camera remains secure throughout changing seasons.
- Integrate Wyze cameras with smart home systems like Alexa or Google Home to automate responses (lights, notifications) when motion is detected and simplify multi-camera management.
Why Wyze Outdoor Cameras Are Perfect For Home Security
Wyze outdoor cameras have become popular with DIYers because they deliver solid performance at a price point that doesn’t require a second mortgage. Unlike traditional security systems, you’re not locked into a contract or paying monthly monitoring fees. Most Wyze models are battery-powered, so you skip running power lines entirely, a genuine advantage for renters and homeowners alike.
The outdoor models come with weatherproofing built in (typically IP65 rating, meaning dust- and water-resistant), night vision, and cloud storage options. Setup takes minutes: mount it, connect to your phone, and you’re recording. For homeowners looking to add cameras without major renovation work, this plug-and-play approach beats the alternative.
Key Features For Outdoor Performance
IP65 weatherproofing means the camera survives rain, snow, and dust without degradation. That said, don’t mount one directly under a gutter in heavy downpour zones, water won’t destroy it, but constant spray shortens lifespan.
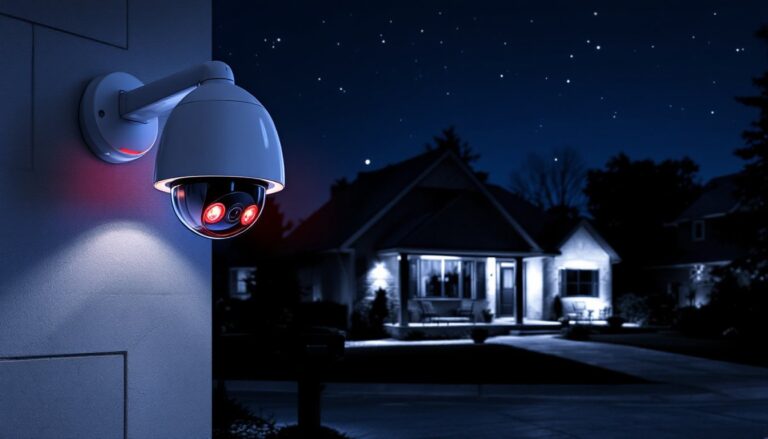
Night vision with infrared is standard on outdoor models. In complete darkness, you’ll see shapes and motion clearly up to about 20–30 feet. If you need color at night, infrared-only isn’t ideal, but it’s better than nothing.
Motion detection and alerts trigger notifications to your phone when someone crosses the camera’s field. Sensitivity can be adjusted to reduce false alerts from blowing branches or passing cars, essential if you’re on a busy street.
Two-way audio lets you talk through the camera (announcing a package delivery or warning off trespassers). The mic and speaker are decent quality indoors: outdoors, wind noise sometimes muddles the audio.
Installation Tips For Maximum Coverage
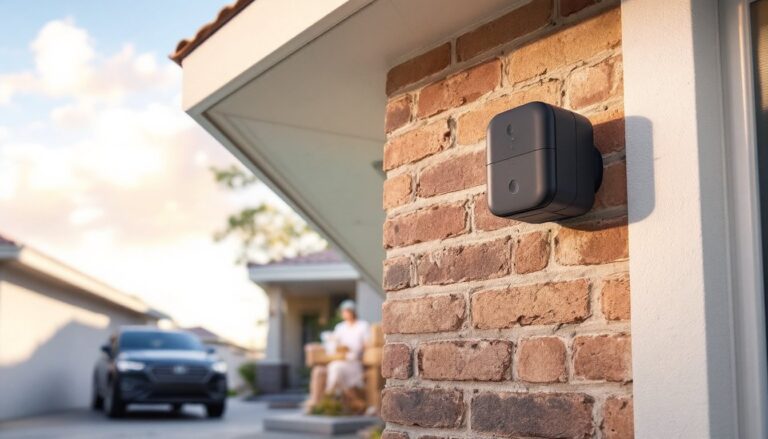
Placement is everything. A camera mounted at eye level covers faces clearly but misses shoes, exactly what you need for porch theft. Corners of the property catch the widest view. Mount cameras 8–12 feet high when possible: this height avoids easy tampering and captures both approaching figures and overhead details like package drops.
Mounting hardware varies by surface. For brick or stucco, use concrete anchors and stainless steel screws to resist corrosion. Wood-siding homes can use lag bolts directly into the stud. Locate studs with a basic stud finder, a $15 tool that pays for itself in the first week of projects. If you’re renting, adhesive mounts exist, though they don’t hold as securely as screwed installations.
Position the camera with a slight downward angle (10–15 degrees) so you’re capturing faces, not sky. Test the WiFi signal at the installation location before mounting: if you’re more than 40–50 feet from your router or if walls are in the way, consider a WiFi extender. A wireless outdoor camera is only useful if it actually stays connected.
Cable management: run any power cables (for wired models or charging stations) along the building edge, secured with clips every 2 feet to keep them tidy and out of sight. Some homeowners use conduit for cables that cross open areas, though this adds cost and isn’t strictly necessary unless the runs are very visible.
Weatherproofing And Protection Best Practices
Even though outdoor Wyze cameras are rated for weather, a little strategic shelter extends their lifespan significantly. Avoid mounting directly in the sun’s path, heat buildup stresses the lens and processor. If your only option is a sun-exposed wall, use a small overhang or install a thin metal or plastic visor above the camera to shade the lens.
In regions with freezing winters, battery drain accelerates below 32°F (0°C). Most Wyze outdoor cameras perform down to about 20°F, but they won’t function reliably below that. If you live in a very cold climate and want year-round monitoring, consider running power to the camera (some wired models stay functional to 0°F) or replacing batteries more frequently.
For heavy rain zones, ensure the camera isn’t pointed directly into prevailing wind-driven rain: angle it slightly to one side. A small gutter above the mount helps shed water away from the camera body.
Inspect mounting hardware semi-annually. Stainless screws resist rust, but vibration can loosen fasteners. A quick check with a wrench in spring and fall prevents the camera from sagging mid-season. Check the lens for spiderwebs and dirt, they’ll blur footage. Use a soft, dry cloth (no solvents unless the manufacturer specifies) to clean the lens.
Optimizing Video Quality And Night Vision Outdoors
Video quality hinges on three things: lighting, camera angle, and sensor capabilities. During the day, angle the camera so the sun isn’t directly behind the subject (backlighting washes out faces). Early morning and late afternoon light are ideal: midday sun creates harsh shadows that obscure detail.
Night vision relies on the camera’s infrared emitters and sensor sensitivity. Wyze outdoor models deliver gray-scale footage in total darkness, which is adequate for detecting intrusion but won’t resolve fine details. If you need color night vision, infrared alone won’t achieve it. Some users supplement with a motion-activated floodlight pointed at the camera area, this triggers illumination when motion is detected, and the camera captures color footage. Recent reviews of outdoor security cameras highlight this trade-off: infrared is power-efficient and works anywhere, but a lighting supplement improves identification accuracy.
Adjust motion detection sensitivity based on your environment. A camera pointed at a busy street needs higher threshold settings to avoid constant false alerts. A driveway camera benefits from lower sensitivity to catch someone approaching. Most Wyze apps let you define activity zones, draw a rectangle around the area you care about, and the camera ignores motion outside that zone.
Cloud storage and local backup: Wyze offers both cloud and microSD card storage. Cloud is convenient (access footage from anywhere) but requires a subscription. A microSD card (64GB or larger, U3 speed rating) provides local backup: the camera loops footage once the card fills, so you don’t lose old recordings unless you need them for evidence.
Integrating Wyze Cameras Into Your Smart Home
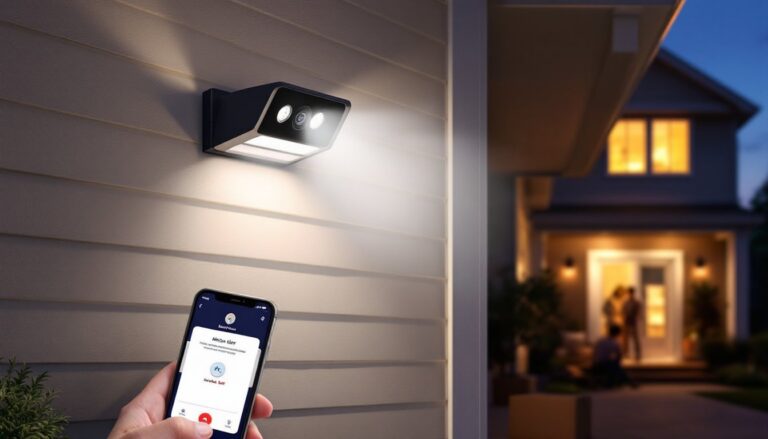
If you’re already running smart lights, locks, or a thermostat, adding Wyze cameras is straightforward. Most Wyze devices play nicely with Amazon Alexa and Google Home. You can voice-command cameras to show on a smart display: “Alexa, show me the front door camera.” This is genuinely useful if you’re working in the yard and want a quick check of the driveway.
Automation routines can trigger actions when motion is detected. For example, a camera detecting motion after sunset could trigger an outdoor light and send a phone notification simultaneously. Smart home technology news consistently shows homeowners valuing these integrations because they reduce manual checking and create a cohesive security ecosystem.
App notifications and scheduling are straightforward. Disable notifications during work hours if you’re monitoring a busy area, then re-enable them in the evening. Scheduled recording (recording only at night, for example) saves battery and cloud storage costs.
Multi-camera setups are common for good reason: two cameras covering different angles catch details that one camera misses. If you’re adding a second Wyze camera, they share the same app interface and can be grouped for easy viewing. No additional hub or complex networking required.
Common Setup Issues And Troubleshooting Solutions
WiFi connectivity drops are the most common complaint. Wyze cameras need a stable 2.4 GHz WiFi signal (not 5 GHz, which has shorter range through walls). If your router is far away or behind multiple walls, the connection is unreliable. First step: run a WiFi speed test at the camera location using your phone. If signal is below 2–3 bars, add a WiFi extender or mesh system in range of the camera. Second step: ensure the camera isn’t competing with dozens of other devices for bandwidth: most home routers handle 10–15 devices well but struggle beyond that.
Night vision is blurry or dim. Check that the lens is clean and the camera isn’t pointed at a reflective surface (which bounces IR back into the sensor). Ensure the camera isn’t aimed through a window or screen: glass and screens block infrared. If the image is still dim, the camera may be beyond its rated 20–30 foot range, move it closer to the subject area or add an external light.
Video lags or stops recording. Verify the microSD card is compatible (Wyze recommends U3-rated cards, 64GB–512GB) and that it’s fully inserted. A corrupted card can cause gaps: try reformatting the card in the camera itself rather than on a computer. If cloud recording fails, check your internet speed and confirm your subscription is active.
Motion alerts aren’t triggering. Confirm the sensitivity slider isn’t set to zero and that the motion zone includes the area where movement occurs. Adjust sensitivity in the app: set it higher if you want to catch distant motion, lower if false alerts are excessive. Test by walking past the camera: the app should notify immediately.