Table of Contents
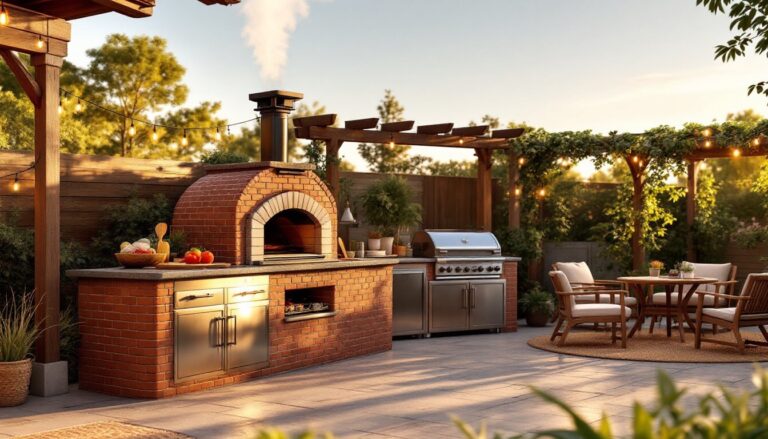
ToggleOutdoor kitchens have evolved from novelty backyard features into genuine extensions of the home, and the right countertop material makes all the difference. Concrete countertops for outdoor kitchens strike an impressive balance: they’re tough enough to handle sun, rain, and constant use, yet malleable enough to match virtually any design vision. Unlike tile or natural stone, concrete offers seamless surfaces, integrated features like built-in drainboards or subtle slopes, and a modern aesthetic that ranges from industrial-chic to refined and contemporary. Whether you’re building from scratch or upgrading an existing setup, understanding why concrete works, how to install it correctly, and how to maintain it will set you up for a countertop that performs for decades.
Key Takeaways
- Concrete countertops for outdoor kitchens offer an unbeatable combination of durability, design flexibility, and cost-effectiveness, ranging from $65–$150 per square foot installed compared to natural stone or solid surface materials.
- Sealing is non-negotiable for outdoor concrete countertops—use penetrating epoxy, polyurethane, or specialized outdoor sealers and reapply every 2–3 years (or 1–2 years in harsh climates) to prevent water damage and staining.
- Concrete allows seamless, fully customizable surfaces with integrated features like drainboards, slopes for drainage, and decorative finishes such as exposed aggregate or epoxy effects that aren’t possible with tile or stone.
- Proper installation requires a solid, level substrate, at least 2–3 inches of outdoor-rated concrete, vibration to eliminate air pockets, and a moisture barrier to prevent premature failure.
- Daily maintenance is simple—wipe spills immediately, use pH-neutral cleaners, and avoid acidic products—but neglecting sealer recoating or exposing concrete to salt, citrus, and oils invites long-term damage.
- Plan outdoor kitchen projects with realistic timelines and budgets that include initial sealing costs ($0.50–$1.50 per square foot) plus ongoing maintenance, as proper upkeep ensures decades of reliable performance.
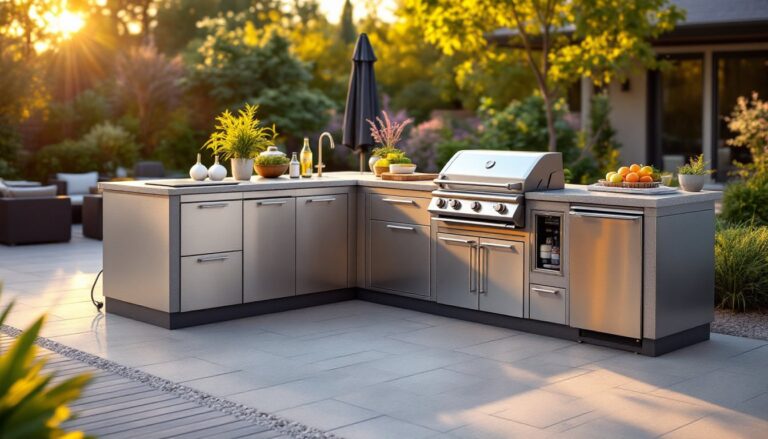
Why Concrete Is The Best Choice For Outdoor Kitchen Countertops
Concrete dominates outdoor kitchen designs because it checks every practical box while delivering genuine style. It’s nonporous when sealed correctly, meaning it resists water damage and staining far better than unsealed wood or soft stone. The material’s compressive strength, typically 3,000 to 4,000 PSI (pounds per square inch) in a standard mix, means it handles heavy cookware, hot pans, and the occasional impact without chipping like granite or cracking like cheaper composites.
Durability also comes down to weather resilience. Outdoor concrete countertops withstand UV exposure, thermal cycling (freeze-thaw in colder climates), and salt spray near coastal areas when finished with a high-quality sealer. This is where many DIYers stumble: they assume bare concrete is weatherproof, but it absolutely isn’t. A concrete countertop designed to last outdoors must be sealed with a penetrating epoxy, polyurethane, or specialized outdoor concrete sealer, a step we’ll cover in detail later.
Cost-effectiveness rounds out the appeal. Concrete typically runs $65 to $150 per square foot installed, depending on finish complexity and location, considerably less than solid surface materials or natural stone. Combined with minimal maintenance compared to wood and the ability to customize color and texture, concrete delivers strong value for a premium look. Custom outdoor living spaces often feature concrete as the foundation for good reason: it’s the workhorse material that won’t drain your budget or force constant repairs.
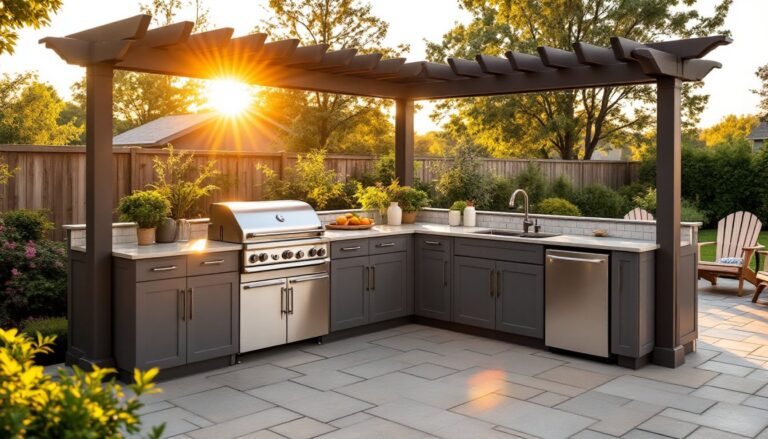
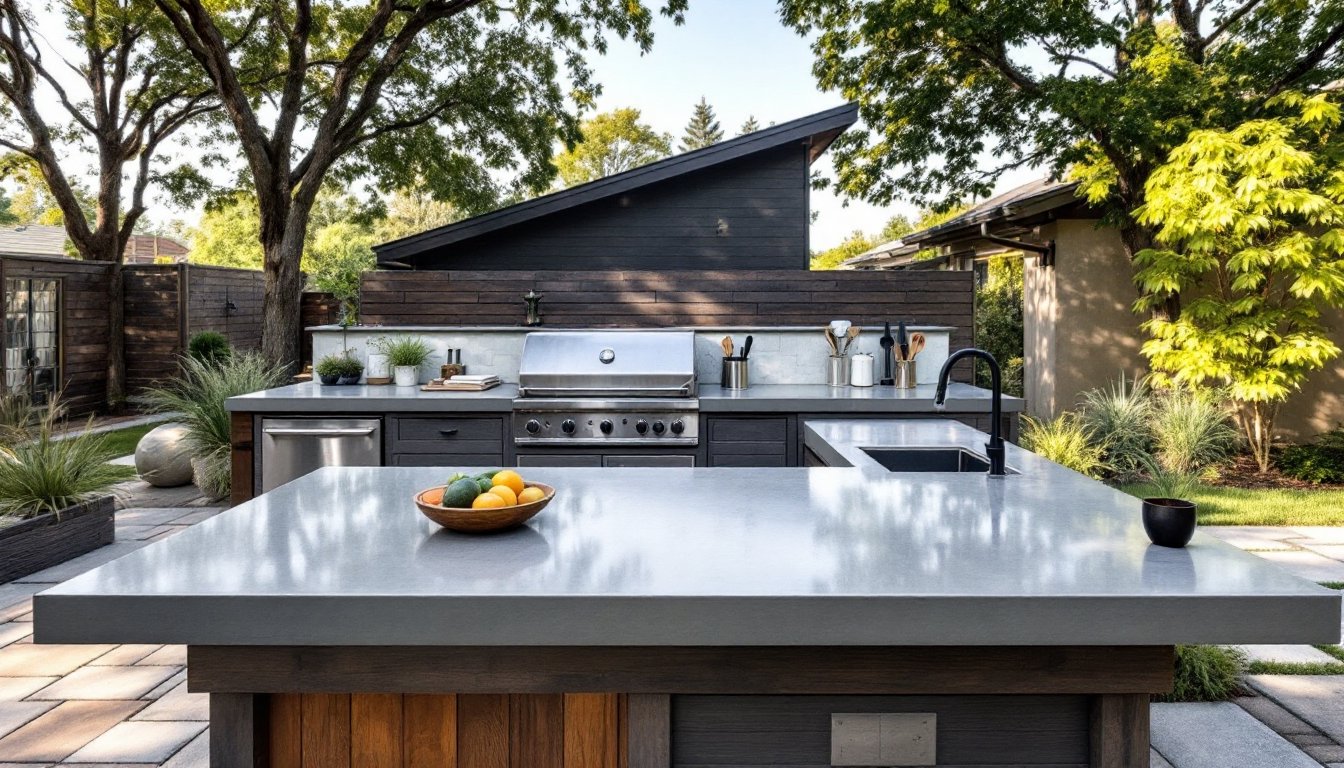
Design Flexibility And Customization Options
One reason concrete has become the default for high-end outdoor kitchens is sheer creative freedom. You can pour it in any shape, curved countertops, integrated backsplashes, or wraparound islands, without the joints that plague tile or stone. Integral color is mixed into the concrete itself, so you’re not limited to a few standard hues: custom pigments allow soft grays, warm earth tones, or even bold accent colors that won’t fade like painted surfaces.
Texture opens another avenue. A smooth troweled finish feels refined and modern. Brushed or broom finishes provide slip resistance in wet areas. Exposed aggregate, where pebbles or decorative stone fragments remain visible in the surface, creates visual depth and a more organic, high-end appearance. Some outdoor kitchens showcase stamped or scored patterns that echo tile or pavers without the maintenance headaches.
Integrated features distinguish concrete from other countertop materials. A slight slope (typically 1/8 inch per foot) can guide water toward a drain or edge. Drainboards, integrated sinks, or subtle depressions for utensil organization are poured in place. You can also embed decorative elements, stone, glass, or even epoxy river effects, into the surface. This level of customization transforms a countertop from purely functional into a conversation piece. A guide to concrete kitchen countertops explores these design possibilities in depth, showing how personalization drives both aesthetics and long-term satisfaction.
Installation And Preparation Essentials
Installing concrete countertops outdoors demands more preparation than indoor projects because outdoor exposure is unforgiving. Start by building a solid, level substrate, typically 2x lumber framed and braced to eliminate flex. The concrete slab itself should be at least 2 inches thick for residential countertops, though 3 inches is preferable for added durability and the ability to embed features.
Before pouring, seal all wood forms and substrate with a moisture barrier. This prevents the concrete base from absorbing water from below, which causes premature failure and mold issues that compromise both structure and sealing. Use a concrete mix rated for outdoor use: standard off-the-shelf bags work for small projects, but anything over 30 square feet warrants a ready-mix truck delivery to ensure consistent strength and workability.
Air pockets are the silent killer in outdoor concrete. They trap water, freeze in winter climates, and create weak spots. Pour deliberately, vibrate the mix (a small concrete vibrator costs $15–$30 to rent), and strike off excess with a straight edge. Finishing is where precision matters: a steel trowel creates a smooth surface that sheds water effectively, while a broom finish or hand float adds texture for safety.
Sealing And Waterproofing For Outdoor Protection
Sealing isn’t optional, it’s the single most critical step for outdoor concrete countertops. Bare concrete is porous, absorbing water, stains, and failing under UV exposure. A quality penetrating sealer, epoxy, polyurethane, or specialized concrete sealers formulated for outdoors, locks in moisture and creates a sacrificial layer that bears the weather’s brunt.
Two-part epoxy offers the highest durability: it penetrates deeply, cures to a hard finish, and resists UV better than single-part options. Polyurethane provides ease of application and good UV resistance but may need recoating every 2–3 years in harsh climates. Specialized outdoor sealers designed for concrete sit between these extremes: moderate durability, easier refresh cycles. Always follow the manufacturer’s cure schedule (typically 48–72 hours before water contact) and avoid the mistake of sealing before concrete cures fully (minimum 28 days in most climates).
Recoating schedules vary by climate and use. In moderate climates, reseal every 2–3 years: in aggressive climates (high UV, freeze-thaw, salt exposure), every 1–2 years. Many DIYers underestimate how often sealing matters, then blame concrete when staining or damage occurs. Built-in barbecues and other outdoor kitchen components interact directly with your countertop surface, making robust protection essential.
Maintenance Tips To Keep Your Countertops Looking New
Daily maintenance for concrete countertops is straightforward: wipe spills immediately with a damp cloth, use pH-neutral cleaners (avoid acidic or heavily alkaline products that etch concrete), and dry the surface when possible. Food stains, rust marks from cookware feet, or mineral deposits from hard water require gentle scrubbing with a soft brush, aggressive scouring pads or wire brushes damage the sealer.
Prevent staining by treating liquids promptly. Wine, citrus juice, and vinegar-based marinades etch concrete: oil and grease penetrate if left sitting. Use coasters under condiment bottles, and consider a stricter “no open containers” rule near countertops if you live in a harsh climate. In winter climates, salt runoff from boots or stored equipment is a genuine threat, rinse these areas and keep deicing salts away from countertops.
Sealer maintenance is equally vital. After 2–3 years (or per manufacturer guidelines), test sealer integrity by dropping water on the surface: if it beads and rolls off, you’re good. If it soaks in, resealing is due. Many homeowners mistakenly assume a sealed surface never needs resealing: this is the path to premature failure. Resealing before total breakdown is far cheaper and easier than addressing deep water damage later. For those starting an outdoor kitchen project, outdoor kitchen ideas on a budget offers practical guidance on phasing work and managing upkeep costs.
Cost Considerations And Budget Planning
Concrete countertop costs span a wide range depending on finish complexity, size, and whether you’re doing the work yourself or hiring professionals. Basic poured-in-place concrete runs $65–$100 per square foot for a standard gray finish: custom colors, integrated features, or decorative finishes push toward $100–$150 per square foot. Regional labor rates and material availability influence pricing significantly, expect higher costs in urban areas and premium pricing in regions with fewer concrete specialists.
DIY pouring saves labor but demands precision, proper equipment (forms, vibrator, finishing tools), and realistic timeline planning. A 10-foot countertop install takes a professional 1–2 days: DIY timelines stretch longer once you factor in form-building, prep, curing delays, and sealing. Small mistakes in slope or finish are difficult to fix and affect water drainage and stain resistance for years.
Budget for sealing and resealing as ongoing costs. Initial high-quality sealing ($0.50–$1.50 per square foot) is worth the investment: resealing every 2–3 years adds another $100–$300 depending on countertop size. Skimping on sealer or resealing intervals is false economy, water damage, staining, or structural failure repair costs $500–$2,000+ per section. View sealing as maintenance insurance, not an optional luxury. When planning an outdoor kitchen renovation, roll sealing and maintenance into your realistic budget from day one.
Conclusion
Concrete countertops for outdoor kitchens deliver durability, design flexibility, and lasting value when installed and maintained properly. The key is understanding that outdoor concrete isn’t just poured and forgotten, it requires solid substrate prep, correct finishing, robust sealing, and periodic maintenance. Done right, a concrete countertop becomes a reliable workhorse that handles decades of cooking, entertaining, and weather exposure while looking better with age. Start with realistic expectations around sealing frequency and maintenance, frame your project timeline generously, and you’ll enjoy a custom outdoor kitchen that truly performs.